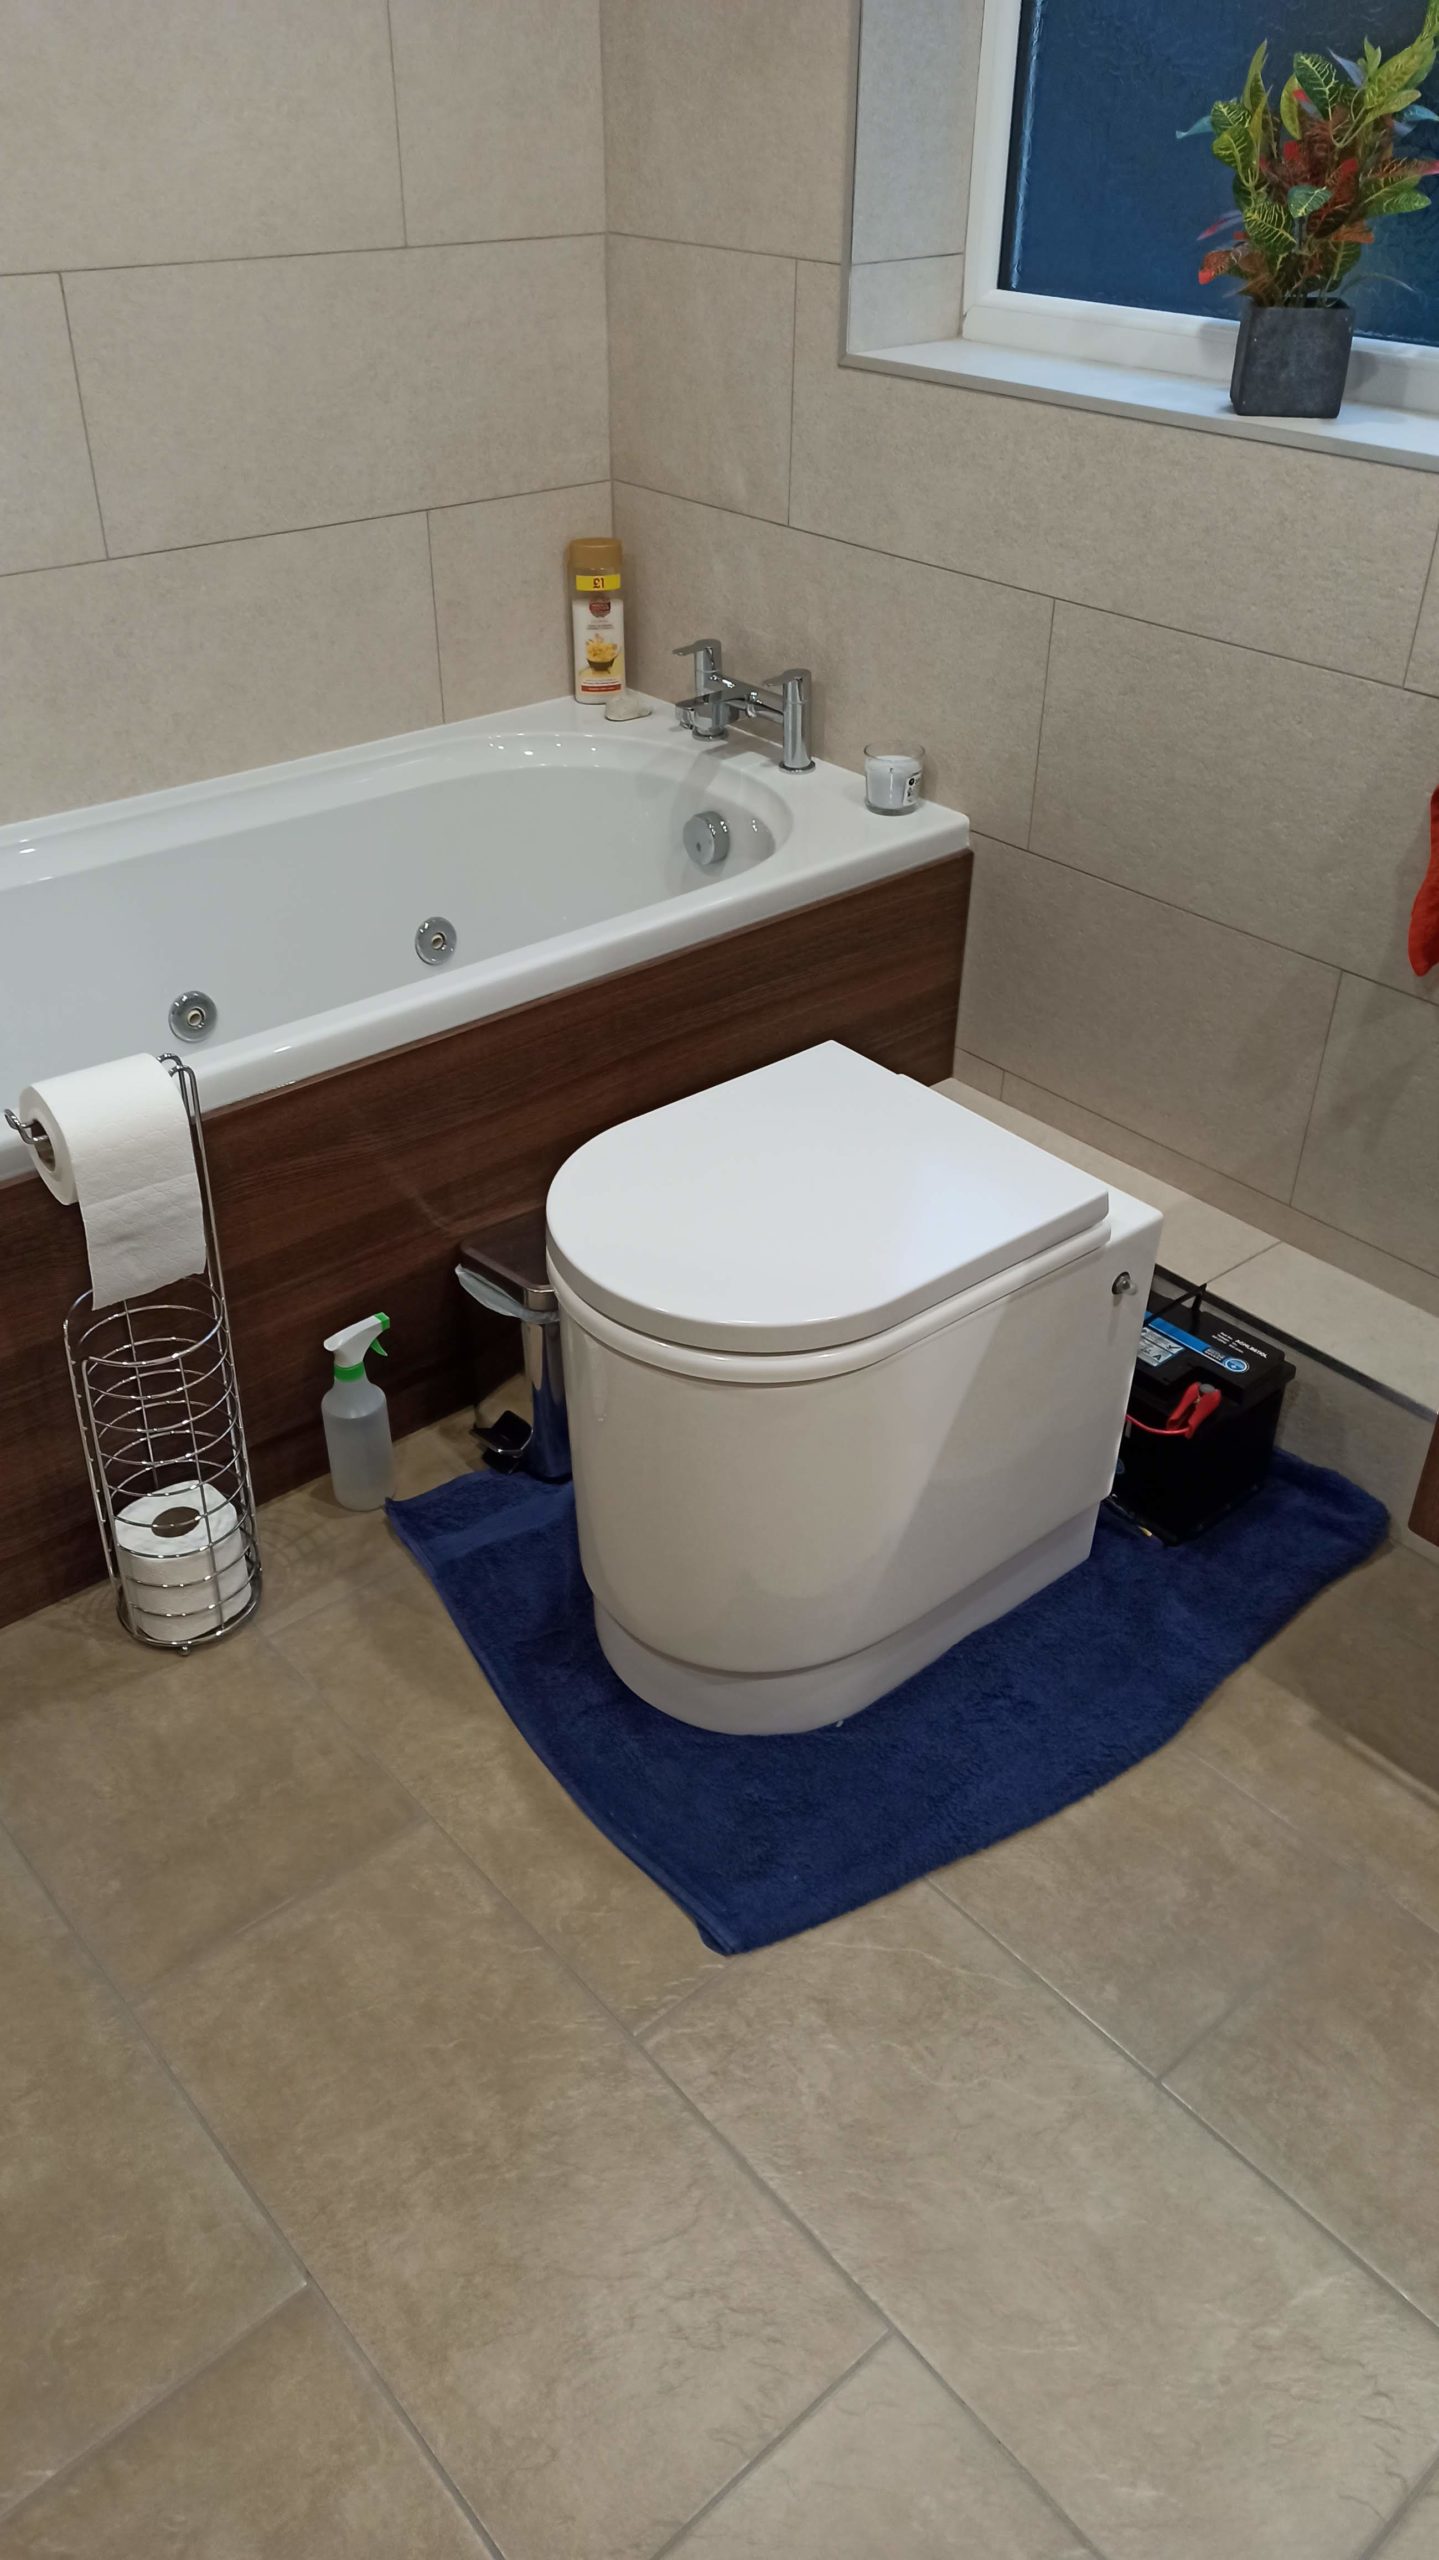
The first issue was removing the existing toilet, according to Youtube, forums and the official installation docs the Thetford C263 was only held down by 4 screws in the base. However we broke it down into 3 steps.
The Compoost toilet had finally arrived, very well packaged and very heavy worryingly heavy. Opening the box and it turns out that the card borad packaged had a wooden frame in whihc sat the toilet it self.
Once unboxed we had only to remove some packaging and affixed the toilet lid very easy although we did have to move the locking pin slightly but very easy to achieve. It was then just down to adding a bag of the previously prepared Coconut Coir and we were good to go.
All setup on the Thursday PM and now the following Monday, urine been emptied twice and compost bucket still going although I think tomorrow maybe our first emptying day. We set it all up in the bathroom and have been using it every day with a fan, no smell sometimes a soil whiff but that is all. we have no fan running and are planning to install it with a fan so it should be fine.
Whilst in Spain we scratched the side of the van by driving down a dead end road and past a tree, the scratches on the decals visible but just marks the scratches on the windows are visible from outside and the inside.
We stopped at the Camper Park El Campello, and tried using Fenwicks Windowise, absolutely useless. Jez, a friend of Sheila and Aidan’s lent us some repairer (Greygate Plastic Polish) he used which was marvellous.
Tried not to use all his supply and felt a little guilty, but on our return we bought 2 bottles, just had another go and it improves each time we use it.
Whilst away in Spain we managed to break our freezer door latch, basically some water got into the mechanism (condensation) and pressing the door button caused the latch arm to stress and snap.
It took a bit of jiggling by both of us and eventually the door opened, we were able to remove the latch fitting and the door closed and seal using the magnetic strip alone. We didn’t have alot in the fridge just ice really so it never burst open whilst driving.
When we got home set about trying to find a replacement, Dometic make alot of different models and each model it seems has different parts so the model number is really irrelevant it is the product code that matters.
Product label
Eventually after going round the houses came across a company Leisure Spares (https://www.leisurespares.co.uk/) who you have to call as the product number is not listed but they were very helpful and identified the part and ordered it there and then, 39.99 inc var and delivery!
Arrived today and fitted in about 5 minutes.
Decided to take the old one apart to see whats what, turns out not complicated so will keep the bit as you never know and it maybe possible to fashion a new bit one day and 3d printer maybe??
We have a Thetford C250 Cassette toilet in the van, fairly standard fare and it works well. When it is really hot then it needs emptying frequently as it can smell, even with extra doses of the chemicals.
We use Elsan Green, very thick and not unpleasant odour, its not perfect but one small dose works fine unless hot or overloaded in one go. We find that without other options then the cassette only last 36 hours and needs emptying.
We do have a 2nd cassette but that is for extreme circumstances as it is a bugger to get to (garage emptying) and then involves storing the full one at the back of the garage . This is such a tedious process that we have on all but one occasion moved and emptied rather than use it.
We are used to the cassette and have found the emptying experience to be varied from OK to ugh!! But at no point is it something either of us enjoy.
Most of the time the cassette is manageable especially in England when on sites , CLs etc.. but abroad especially Portugal, Spain, we found it an issue as we had to seek out emptying points every other day, not such an issue when touring as we tend to move every day, but disruptive.
There are occasions when we do not want to move, good pitch, plans for the day etc… this has occurred even in the UK.
So we started to consider our options:
Black tank, space constraints for the tank and the hoses probably ruled this out, but also emptying was still a PIA tricky to use standard Elsan points and not as easy as a cassette, so not a goer for us in the current van.
Incinerator toilet, very clean and quick, large item to install in comparison to the cassette toilet though. Power usage (gas) is high, we want to save our gas for heating, cooling and cooking. Also very expensive to buy and as new we understand it is prone to issues. In which case you are stuffed.
Use more public facilities, this is a real option and works in the UK where most places have toilets, but it does restrict where you go and with the best will only stretches the cassette out to 3 days max!!
Compost toilet, youtubers we watch Gone with the Wynns had a composting toilet in their RV and rated it. The only time we had used one was in an Eco Community where it was ok but a bit heath robinson. But a quick google and some more research threw up that it might be a goer.
Composting toilet options
Natures Head, very popular used by alot of people, well tested and lots of info. Price 950.00
Air Head, very similar to Natures Head, seat more familiar and urine bottle and bit more user friendly. Less promoted than Nature Heads but on the comparison reviews comes out top. Price 950
C-Head, more basic version of the other heads, although has everything required with the bonus of being more compact, different colours, replaceable urine bottles, it starts at 660, but a comparable version is nearer 800.00
Simpliloo, Separetta, considered but does not mix the solids after use, you have to spoon stuff over and also the venting methods appeared vague
Compoost Toilets, a very small UK maker, but an electric timed mixer, multiple venting options, looks like a loo not a medical appliance, easy to empty. A smaller solids compartment, comparable price 860, but extras probably required.
Our favorites after all the research were the C-Head and the Compoost.
Compoost is based in Coventry so we called and arranged to go have a look. Really impressed basically a guy had an idea for his van and a boat build, his wife put it on facebook and a small business was born. It is by far the best looking and the most friendly to use.
The C-Head was still an option but we started to question the quality and this threw up some issues with stories of bits failing over time and the solid emptying not being quite as easy, also keeping clean more bits for material to stick to.
Compoost Pros
Electric mix so when using can be mixed at the same time easily, not possible with C-Head and tricky with other Heads.
Close lid press button walk away, while mixing no getting down and dirty.
As no handles reduced the width and therefore space required, this was an advantage of the C-Head, but negated by being unable to mix whilst in use.
Solid build no holes or areas where material could get stuck therefore easy to keep clean.
Emptying as no cover on the solids bucket it just lifts out and can be easily emptied. Smaller amounts so less conspicuous. This is a big advantage over the Heads as they almost require you to dismantle the toilet which requires room and looks alot messier.
Urine bottle is a solid bottle but does not look medical, 5l.
Visible alert when needs bottle needs emptying.
UK made, very attentive maker, willing to build to your spec for vent, button locations etc…
Cons.
Smaller solids bucket so can only go for 10 uses, although real world use suggests more, 5 days worst case. Liquids is same as others.
Small maker so backup may be an issue.
minimum 9 week lead time
Electrickery can go wrong. However it is easy enough to use without the mixing unlike the others.
Price 860 although cheaper than the Heads it is still alot but it is a nice looking system.
So we have ordered an Compoost and will see how we get on.
Ordered a new mattress from Linthorpe beds, had a couple of quotes and was planning on using Custom Size Mattress Company but the price was forever going up, last straw was when I reduced the thickness and they then tried to tell me I had to have a thicker cool foam top layer at another 40.00, even though they had quoted cheaper for both bigger and smaller thicknesses with standard cool foam!
Linthorpe were helpful, although a bit confused as to the actual mattress model being used. After a small mixup it all arrived safely and was cut to the right shape. It is a bit thick 17.5cm, but workable and no topper required. It is a firm reflex foam with cool blue foam 2.5cm topper.
Only disappointing element is that the wrap has beading which we would have preferred it to not have.
The old mattress will be kept as an emergency spare.
So 3 nights sleeping on it and verdict is it is firm very firm no worries about the firmness! But it is comfortable, as good as the one at home, bit firmer mind as the cool foam topper is a bit thinner.
15 cm thickness would have been perfect and probably not affected the firmness.
Booked into SAP back beginning of June to get the Jacks and the VB Semi air checked over as been on for 2 years.
Set alarm for 05:00 so that time to wake up, have tea etc… before leaving just after 06:00. Set of perfect traffic light to Lincoln and virtually all the way especially round Doncaster.
Arrived SAP bang on 08:00 got through gates and currently waiting whilst they finish off a van to make room. Always the same but normally do not care as we are not waiting.l, but today we are waiting and waiting. We should be away by 10:30, as along away by 11:30 my karma will not be broken.
Darren, popped his head round the door saying ‘… you’re right the leg has moved so we need to fix, where are your batteries?’. This simple query was easily answered and after emptying garage and showing them the battery store. I asked why? We have to do some welding,. WHAT!!!
At midday Darren appears and explains all done and ready to repack garage. So they checked the Jacks, refitted one jack to chasis which required welding, change seals on 2 jacks, check oil level and checked the semi Air, cost 0.00.
Trip home was uneventful other than Royal mail failed to deliver a parcel, so we have to collect from Horncastle PO, as they cannot press a doorbell.
It is available from Amazon eBay and others selling for around 110-120 gbp, arrived quickly very well packaged with all the bits, seems very solid, love the fact that they supply spare for the connectors. Having got a Sunshine Solar 2000w inverter already then these spares are really appreciated. The manual is well written and comprehensive another surprise.
Our inverter history
Our inverter use over the years varies from nothing to full on with extra batteries. At its height we had a seperate bank of 220Ah batteries powering a 2000w PSW, this was for our coffee machine, hair dryer, etc… We then paired down to nothing relying on EHU once a week and 12v for everything. When fulltiming we purchased a small 300w PSW inverter from Bestek which was great for laptop, toothbrush, vac, etc… but due to plugging into 12v socket could only really manage 110w.
Having completed a couple of long tours 3 months and fulltiming for 7 months we have decided that being able to charge more than the Bestek can manage would be really handy specifically the eBike and Ryobi batteries.
Ideally
We have been for a long time considering Lithium and when we do switch will get a inverter (1500w) cabled in properly to existing sockets with decent battery/usage monitoring. As we will likely have to change the chargers and solar controller at the same time.
What type and features?
Has to be pure sine wave, cannot see the point in risking modified, it saves money granted, but limits what can be charged specifically toothbrush, shaver etc…
We would have got an 800w (maybe 600w) but could not find one that had 2 sockets, one for the garage (bikes) one for the hab area, USB sockets, display, remote control decent efficiency and that looked reliable. We could have bought an expensive one that we could use with the future Lithium setup with an app etc… but we do not know what kit we are going for yet. Victor, Voltronic and NDS all being contenders.
The display is probably fairly pointless but we wanted a way to check on the draw by the inverter, to make sure we are not doing something stupid. Attaching the unit directly to batteries means the inverter draw is not reflected on the existing van display panel which is a real shame, it can be done but to do so calls into question the wiring used by the manufacturer (not designed for inverter) where to connect, access, warranty etc… so something we shall leave to a competent installer.
USB sockets there are a couple of items that we use in the van garage Mifi/Wifi that can be run/charged from USB.
Remote control as we want to be able to turn the inverter on and off easily, we had one with the previous sunshine solar setup and it proved invaluable.
Why not reuse the sunshine solar?
It is 2000w, bulky, one of the connectors was damaged when delivered (supplier was not helpful) it has been repaired but … also requires 2 cables for the poles doubles the cable required and the routing of 4 cables is alot more tedious. And it is being used to supply power in the workshop along with a couple of batteries and solar panel (first lockdown project)
Power supply
We are not really concerned about the batteries and power as we only intend using an inverter when driving for charging larger items and there is spare amperage for this. We have solar not alot (120w) but by 10am the batteries are usually full. We have 2 Gel 80Ah batteries that gives us if required a max of about 100Ah to actually use, we never get anywhere near this maybe 20Ah used before sun or a drive tops us up. In practice everything but the bikes and Ryobi can be charged by solar during the day and we will not notice.
Where to fit?
Have found a massive void above the batteries in the garage that is crying out to be used, have considered lots of ways to fit the inverter securely into this space, shelving, on the floor, putting somewhere else. But every solution has some cons the easiest most convenient is attach to the side wall in this void using bolts to hold it secure and allow removal if required.
Directly above this void is the under seat space which is also ideal, but we use this space so would have to partition an area off.
How to fit?
Decided on 4 bolts with wing nuts, may change to locking nuts once in place but we shall see.
New panel cover with cut out for inverter access to controls and sockets
Connecting up?
Have 2 batteries have decided to use the connectors that join batteries together to connect up the inverter queried the sense of this on MotohomeFun and nobody said it was a bad idea.
Cables just using those provided by EDECOA, they seem thick enough and they state they are rated for the inverter.
To be honest when it came to fixing and connecting cables it proved easy partly because we had given it alot of thought.
Our first trip in the van since lockdown started, set off 8:00 to arrive at SMC just after 9am, booked in for 9:30. Easy journey the vision splash on the RH side window has eased driving alone.
There is not a great deal to do, but wanted the previous warranty bits dealing with. Primarily wanted Frankia warranty stamp Thermoguard, Hab check and first 20k/2 year fiat warranty doing.
Frankia warranty
Fiat warranty
Fiat 20k service
Seat cover replacement
Checkout the crazed spot on the roof
Star crazing on roof
We were supposed to pick it up the next day, but as usual SMC didn’t manage it ended up picking it up late Friday. They faffed around doing upholstery and washing the van saved us a job, although we do need to clean it wax soon.
They also spotted some damaged decals so added that to the crazing warranty claim. Easy return journey actually very quick. Also by the following Tuesday the warrahty claim had been approved, just waiting on the decals.